


How to Manage Orders
Step 1: Navigate to the Orders Section
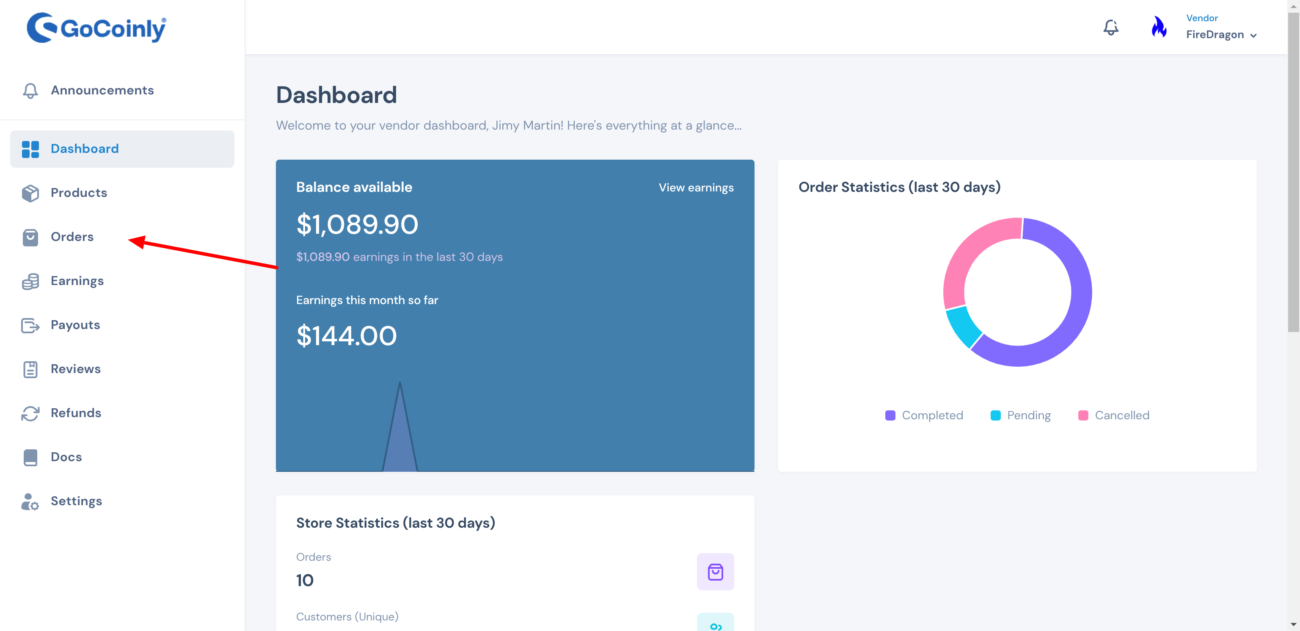
- After Logging In to Dashboard: You’ll see the dashboard with various menu options.
- Select Orders: Click on the “Orders” option in the left sidebar.
Step 2: Understand the Order Number
- Order Number: This is a unique identifier for each order. It’s essential for tracking and referencing specific orders within the system.
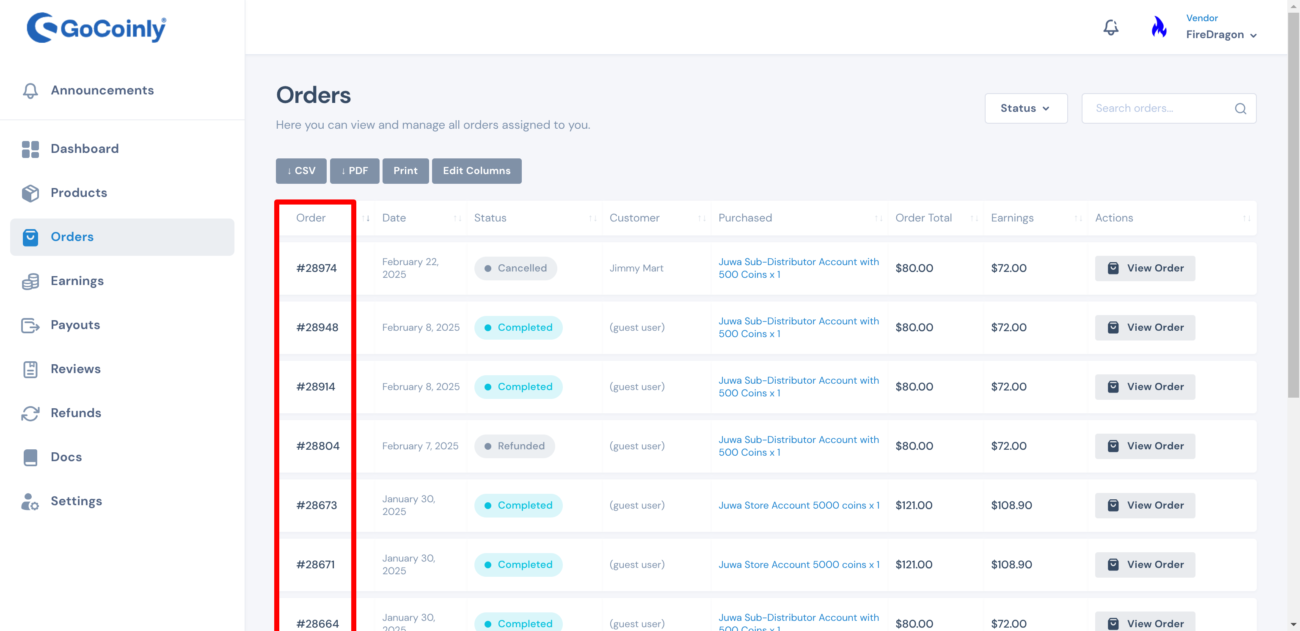
Step 3: Understand the Order Date
- Order Date: This column shows the date when the order was placed. It’s essential for tracking and referencing the timeline of transactions.

Step 4: Understand Order Status
- Order Status: Each order is marked with a specific status such as “Cancelled,” “Completed,” or “Refunded.” These statuses help you track and manage the progress of each order.

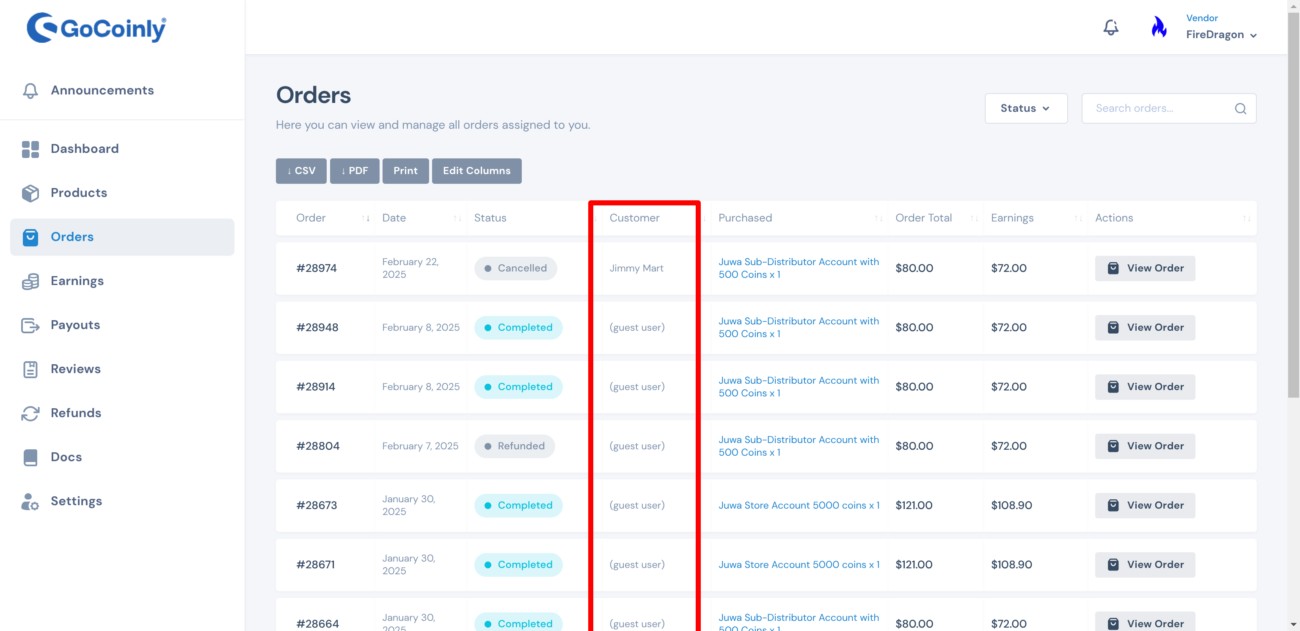
Step 5: Understand Customer Details
- Customer Details: This column shows the name of the customer who placed the order. If the name is “guest user,” it indicates the customer did not log in while placing the order.
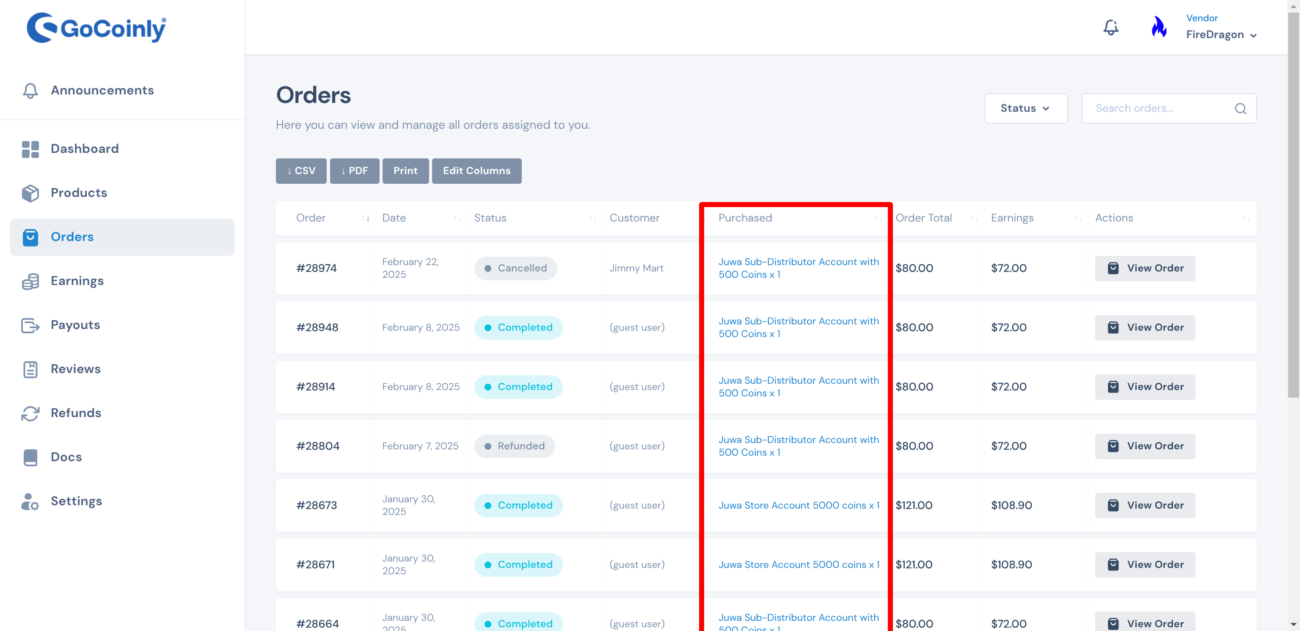
Step 6: Understand the Product Name
- Product Name: This column shows the name of the purchased product, such as “Juwa Sub-Distributor Account with 500 Coins” or “Juwa Store Account 5000 coins.” This helps in identifying the exact items ordered.
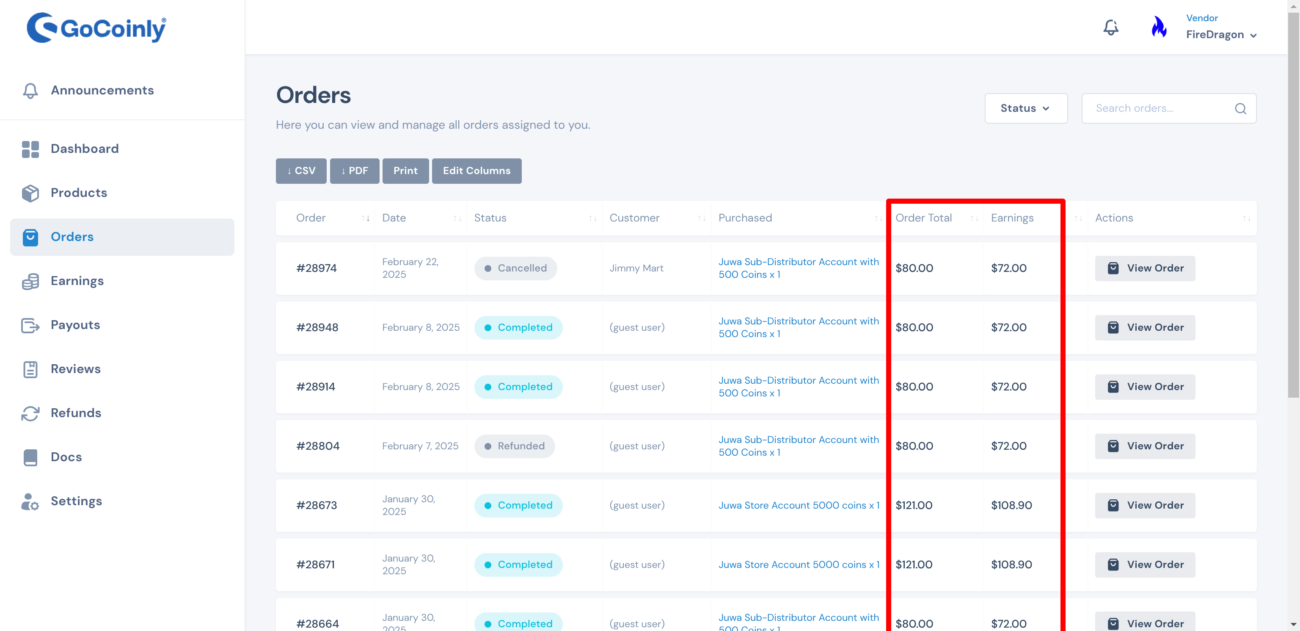
Step 7: Understand Total Earnings and Vendor Earnings
- Total Earnings: This column displays the total amount of money earned from the order. It includes the total purchase price paid by the customer.
- Vendor Earnings: This column shows the amount the vendor earns after deducting the marketplace fee. Keep in mind that 10% is deducted for marketplace advertising, running the platform, providing a safe and secure environment, and managing the team.
Step 8: View Order Details
- View Order: Click on the “View Order” button next to each order to see detailed information about the order, including customer details, product information, and transaction history.
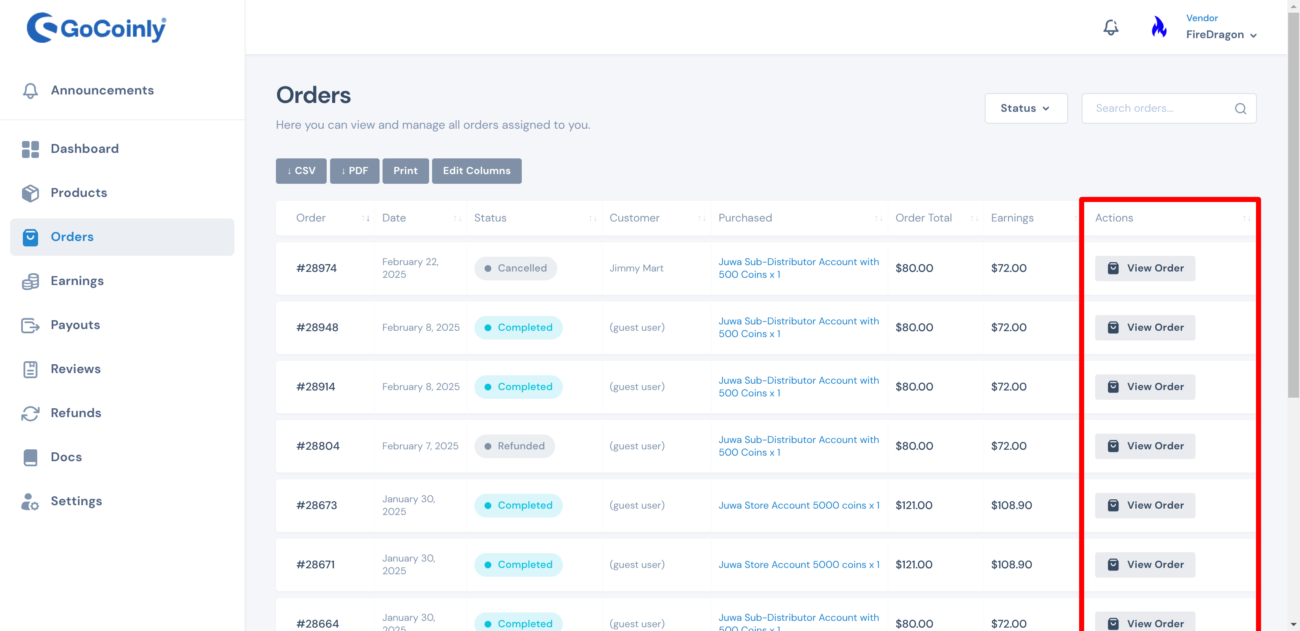
Step 7: View Order Details
- View Order: Click on the “View Order” button next to each order to see detailed information about the order, including customer details, product information, and transaction history.

Step 9: View Order Details
- Order Details: After clicking “View Order,” you’ll see detailed information about the order. This includes:
- Order Number: The unique identifier for the order.
- Order Date: When the order was placed.
- Order Status: The current status of the order (e.g., Cancelled, Completed).
- Customer Details: The name and email of the customer.
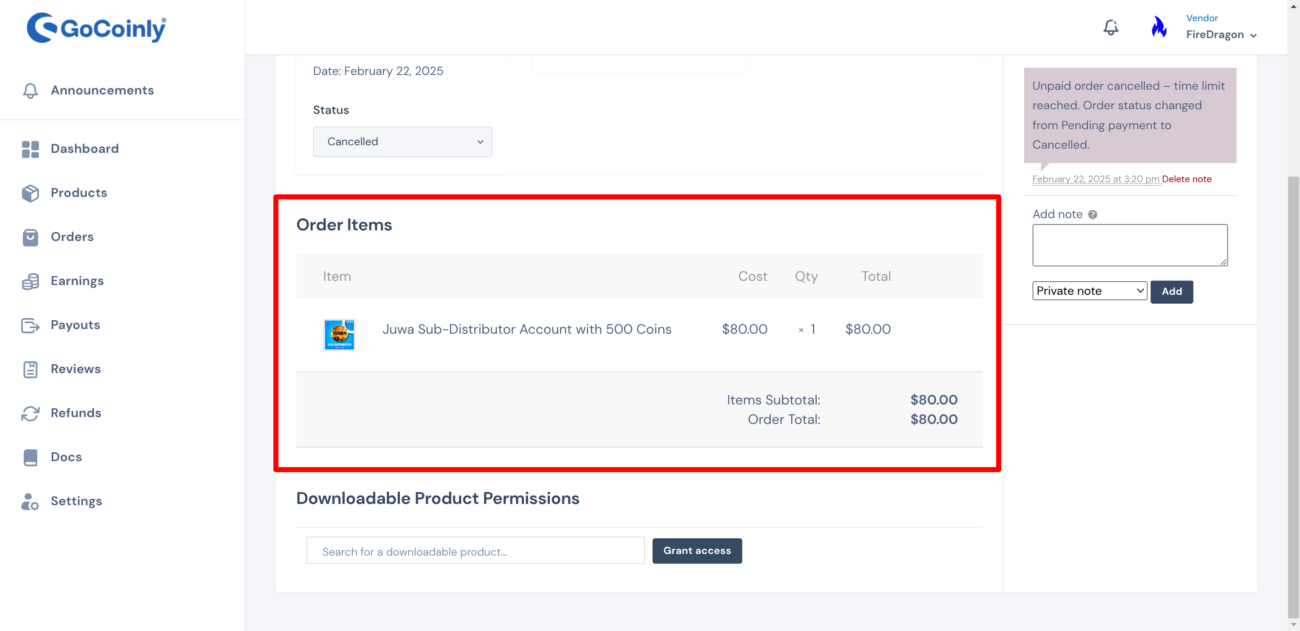
- Order Items: The list of products purchased in the order.
- Total Earnings: The total amount earned from the order.
- Vendor Earnings: The vendor’s share after marketplace fees.

Step 10: View Product Name and Details
- Product Name: The name of the product purchased (e.g., “Juwa Sub-Distributor Account with 500 Coins”).
- Product Details: Detailed information about the product, including the quantity, price, and any specific notes related to the order (e.g., “The unpaid order was cancelled due to the time limit being reached. The status was changed from ‘Pending payment’ to ‘Cancelled'”).
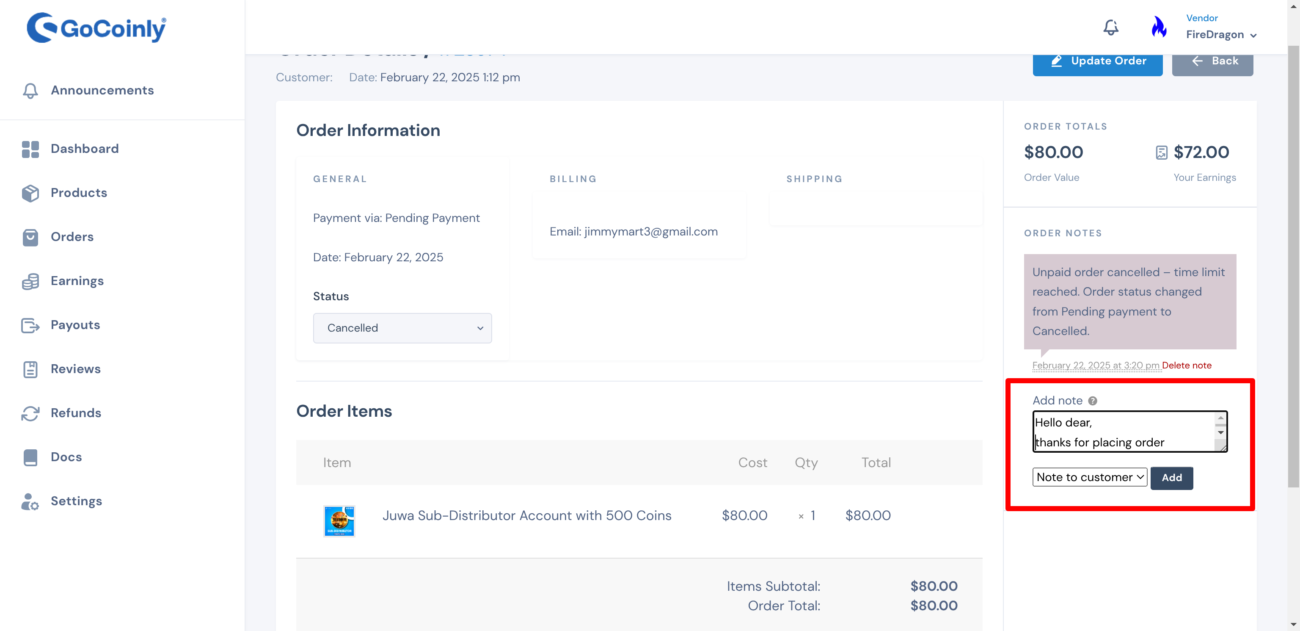
Step 11: Add a Note to the Customer
- Order Details Page: Once you are viewing the order details, you’ll find a section for adding notes.
- Send Note to Customer: Enter your message in the provided text box (e.g., “Hello dear, thanks for placing the order.”). Click the “Send Note” button to send the message to the customer.
End 🙂