


Vendor Settings
Step 1: Access Vendor Settings
- Dashboard Sidebar: On your vendor dashboard, locate the “Settings” option in the left-hand sidebar. Click on it to access the vendor settings page.

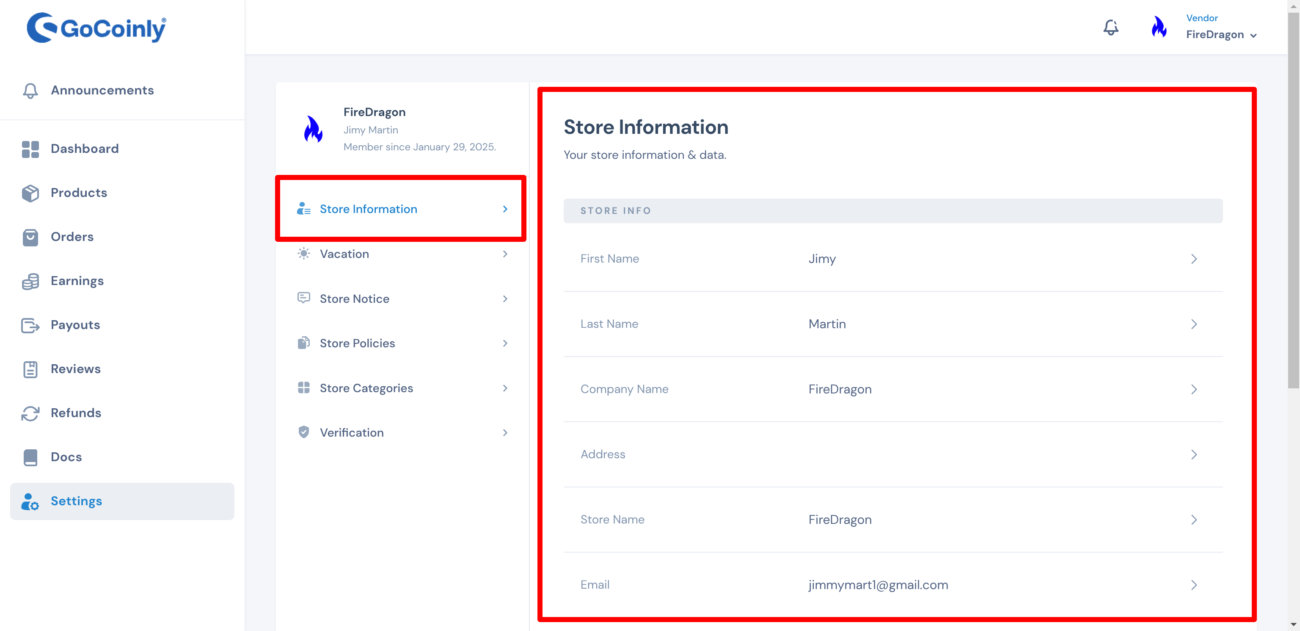
Step 2: Configure Store Information
- Store Information: In the “Store Information” section, you’ll find fields to update your first name, last name, company name, store name, and email address. Ensure all information is accurate and up-to-date.
Step 3: Update Store Logo and Banner
- Store Logo: In the “Store Information” section, you’ll see an option to upload your store logo. Click on the “Choose File” button and select the image file you want to use as your store logo. Once selected, click the “Upload” button to update your store logo.
- Banner Image: Below the store logo, there’s an option to upload a banner image for your store. Click on the “Choose File” button, select the image file you want to use as your banner, and click the “Upload” button to update your banner image. This banner will be displayed at the top of your store page.

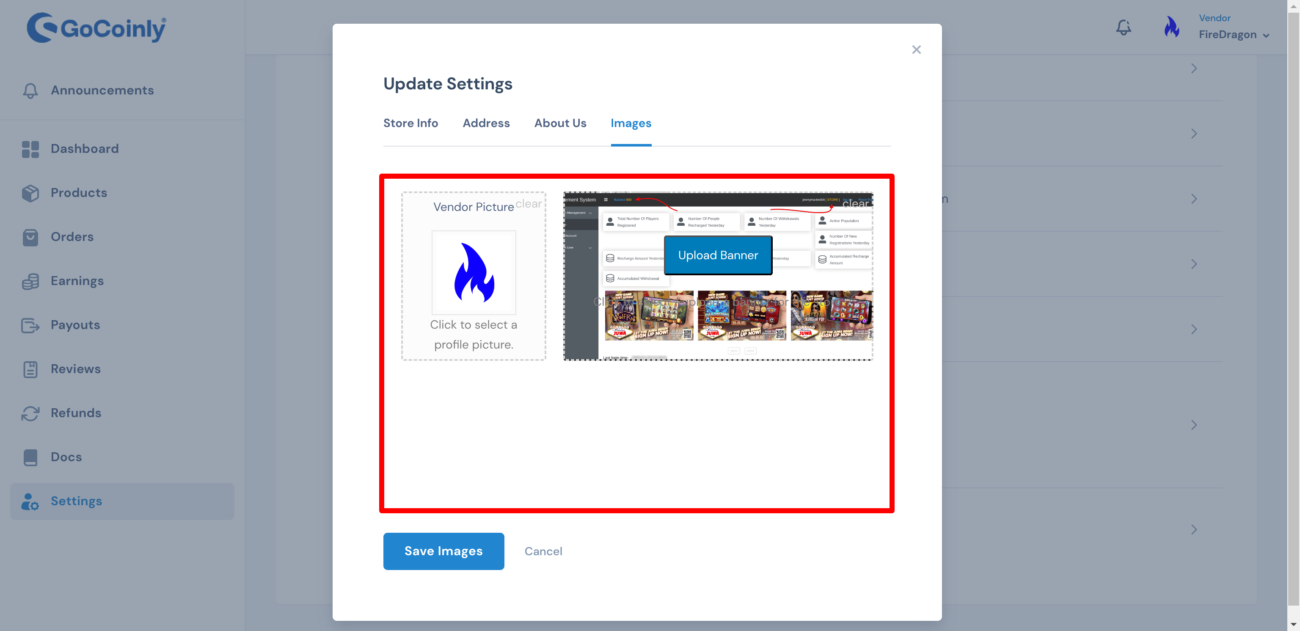
Step 4: Update Store Logo and Banner
- Store Logo: In the “Images” tab of the “Update Settings” section, click on the placeholder for the vendor picture labeled “Click to select a profile picture.” Select the image file you want to use as your store logo and upload it.
- Banner Image: On the same “Images” tab, click on the “Upload Banner” button to upload a custom banner image for your store. Ensure the image aligns with your brand’s identity.
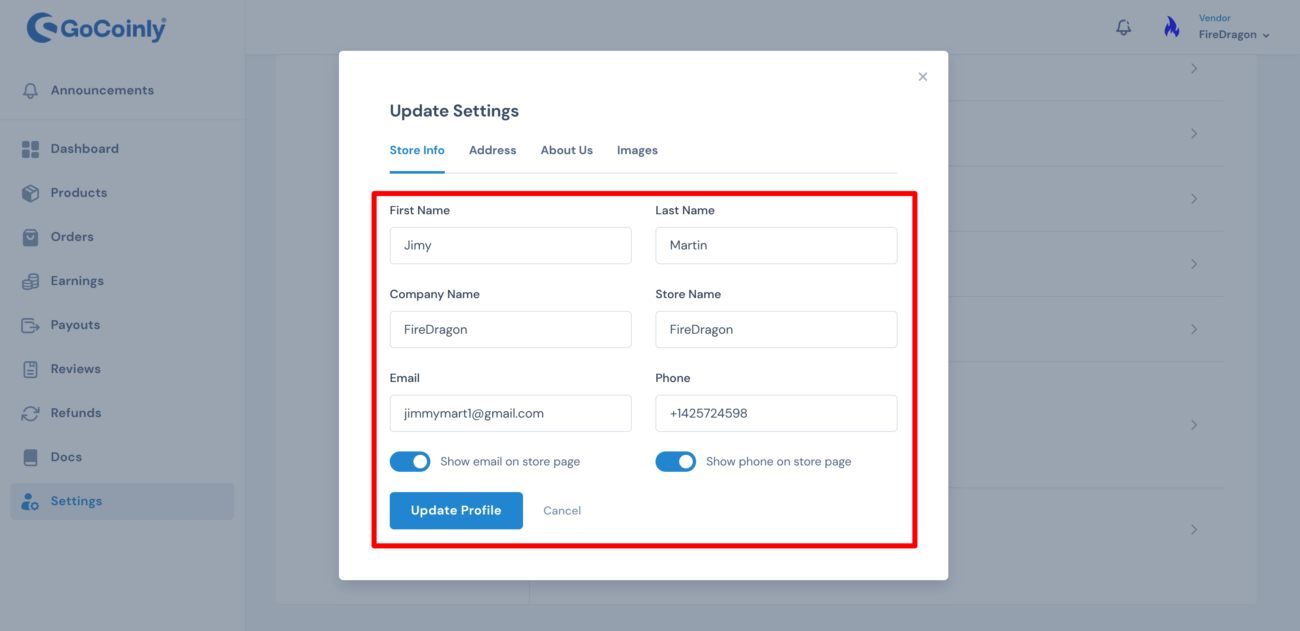
Step 5: Update Store Information
- Store Info Tab: On the vendor settings page, navigate to the “Store Info” tab.
- Store Details: Enter the following information in the respective fields:
- First Name: ……..
- Last Name: ……..
- Company Name: ……..
- Store Name: ……..
- Email: ……..
- Phone: ……..
- Display Options: Choose whether to show your email and phone number on your store page. The phone number option is currently toggled on.
- Save Changes: Click the “Update Profile” button to save your changes or “Cancel” to discard them.
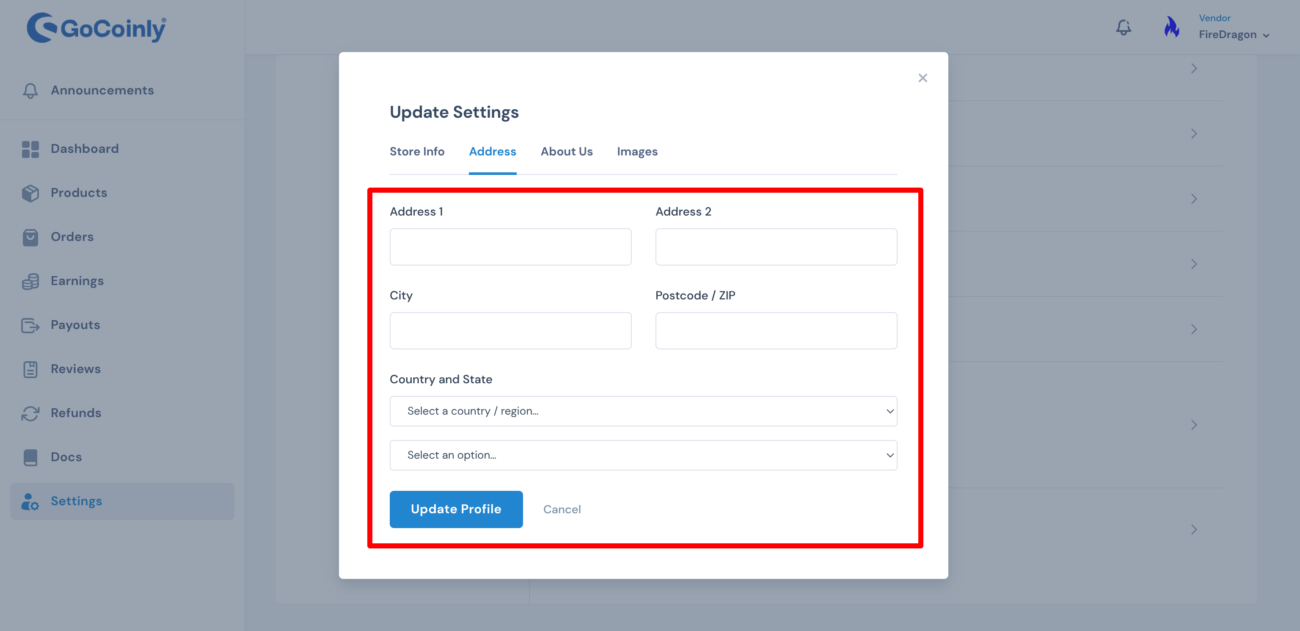
Step 6: Update Address Information
- Address Information: In the “Store Information” section, navigate to the “Address” fields. Ensure you accurately fill in the following details:
- Address 1: Enter your street address (e.g., 123 Main Street).
- Address 2: Add additional address information if necessary (e.g., Suite 4B).
- City: Enter the city name where your store is located.
- Postcode/ZIP: Enter your area’s postal code or ZIP code.
- Country: Select your country from the dropdown menu.
- State: Select your state or region from the dropdown menu.
- Save Changes: After entering all the address information, click the “Update Profile”
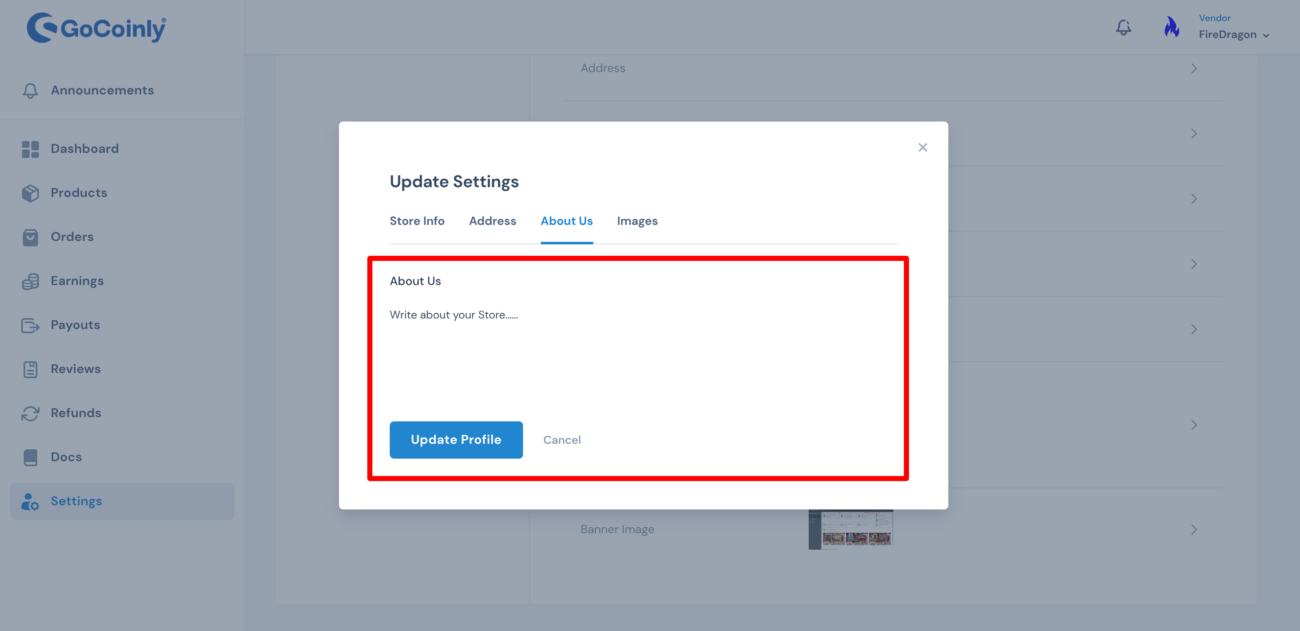
Step 7: Update About Your Store
- About Us Section: In the “Update Settings” page, navigate to the “About Us” tab.
- Write About Your Store: In the provided text box, enter a detailed description of your store. This is where you can share information about your store’s history, mission, values, and what makes your store unique. For example, you might write about your store’s commitment to providing high-quality casino game coins, exceptional customer service, and secure transactions.
- Update Profile: After filling out the “About Us” section, click the “Update Profile” button to save your changes. If you need to discard changes, click “Cancel.”